With this series of chairs, my control of leg and spindle angles is much improved. I've changed how the holes are bored in the arms and the seats. I made a new jig, shaped like the arm, into which the arm nests and is clamped down. It is made of particle board, and is half round, the same diameter of the seat back. On the face are parallel lines; these I align with the pencil marks the on the arms, where the 5/8" holes will be bored. With an odd number of spindles I always start by marking the location of the center hole. Then the others are marked out with a compass/pencil at 2 1/4" on center. I have a number of elm blocks, some 2" x 6" x 8", each end of which is cut to a different angle. I rest the block on the pencil line on the particle board, and keep the auger bit to the correct angle by eye. We must get some photos. The holes bored next are those in the seat. Their location is marked on the seat in the same manner as the arms, however I no longer drill them straightaway. I've made a frame to the height of the short spindles, about 9". I clamp this frame to the seat, and them clamp the arm to the frame. I am thus able to hold the arm in its final position, i.e., it's neither to the left or the right. Then I slide in the long spindles and see just how they really do line up with the marks I've already made. Rather than having to cheat a spindle in place after boring a hole, I can move the marks around a bit, this minimizing having to force any spindle into place. And I can more readily maintain the symmetry of the spindles.
The holes for the short spindles are bored next. The angle is usually 7 degrees, but is somewhat a function of the width of the arm. Coming off the glue and steam bending clamps, the arms can spring not at all, or more than not at all. At 8 1/2" above the seat, and at varying widths, the angles of the spindles change. (The math is easy to figure out; and I keep it written on the sheet rock in the shop.) Having said all that, there is a lot of wiggle room with the short spindles, and it's better to move them to fit the arm, rather than the other way round. Again, I have a piece of ply with pencil lines, and a block to guide angles and uprightness of the spindle holes. However, having bored these, I put the frame back on the seat, with the short and long spindles in place, and see just where the former end up in comparison with the marks I've made, where I 'think' they should go. Again, anything too far out is easily spotted, and I can adjust things. The 1/2" holes in the arms for the short spindles are the only holes made not using my Millers Falls brace. (The Makita cordless is a very nice drill.)
Another favorite seat. Note the grain lines on the seat, left and right where the short spindles go in; not by accident. Also, but only barely visible are the matching grain lines on the front of the seat, left and right.
Spot on legs!
Sacre Coeur Woodshop
(SacreCoeurWoodshop(dot)com automatically directs to this blog,SacreCoeurWoodshop.blogspot.com)
Thursday, February 11, 2016
Chair #9

That bit of brown swirl on the left arm is beautiful in close.
Both front and rear legs' angles are right on in Chair #9. Note also the very evenly angled spindles.
The crooked appearance of the comb is an illusion. Of this set, #9 is my favorite.
The other seat style, quarter sawn grain lines.
Ah! There is a close up of the arm. Whaddya know? Sun behind a cloud.
Chair #7
Chair #7, along with #'s 8,9, & 10 went to the Riverboat Days Art Festival in August of 2015, where #8 was sold, as was #3, seen way, way down below. This is a favorite seat to which the picture does not do justice.
The photos were taken in probably too bright of light. Five spindles instead of the usual seven, and set at only two degrees. Quite upright.
A fine shot from the back; I think the shadows help here.
The angle of the front legs here is spot on; I'd like the rear legs to have more angle though.
The color of the left, rear leg is true to the actual chair.
Saturday, September 19, 2015
Chairs again at last.
Barn demolition and duck shed building took all of April and May and part of June. Ducklings arrived on June 3rd and lived in the shop in a large cardboard box under a brood lamp for about three weeks, moving into the duck shed when the wiring was completed and signed off on. Outdoor work ate June. (Tomato plants started from seed in June are only now ripening; frost is four weeks off. Oh my.) In preparation for Yankton's Riverboat Days, chair's 7,8,9 & 10 were built.
These first photos are Chair #3 7/8, ("Three and seven eights.") This is the chair that would have been #4 but that the rear legs were poorly done, and it tipped backwards.
Note the outriggers. They look foolish, but work as an anti-tip solution.
Without them this beautiful seat would have been wasted.
Here the problem of the overly vertical rear legs is apparent. I believe the tall spindles here are angled at 10 degrees.
View from the front. The front legs are also a bit too vertical.
A nice shot from the back. Cogburn spurs!
Duck Shed
More photos of the shed.
From this angle, facing the northwest, the concrete slab shows where the barn stood. The schedule 80 PVC, with the previously buried wiring to the barn, bent double when the hole in the roof didn't quite line up crashing down.
All the most useful salvage from the barn. An orderly heap. Those round posts, now removed, are what remains from the open bay on the north of the barn. It alone gave us 20 pieces of metal roofing. The tall trees in the background are 'Stick Chair' elms. At the far left is a pile of siding, and in the background there is where ducks now loaf in shade on warm days.
Forward in time, zoom! Though punctuated with nail holes, some 90% of the red siding was reusable. Note the metal siding though. All the metal roofing came from the barn. Below the lowest course of siding the racoon-proofing is visible. The entire perimeter has pieces of siding hammered into the ground to deter burrowing. The large opening is, of course, the duck door. The rectangles are ventilation, with 1/4" x 1/4" wire screening. The north end has two as well. And the window frames also have screen openings, in addition to the fixed glass.
The east side. The electric is now contained in an all metal siding building I call 'The electric shed', with a panel and breakers. Not easily seen, in the far right side of this photo, just above the diagonal board, is a section of metal roofing. It is fixed to the building to catch water coming off the roof.
Fitting window frames. The white spots are caulk filling nail holes.
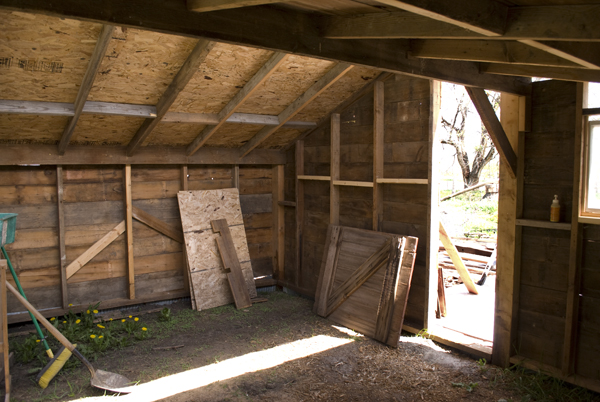
Interior with dandelions. I think the only wood which needing buying were a few 2x4's, and the OSB for the north roof. On the south side rood we reused pine from beneath the metal roofing from the barn. What an Augean nail pulling labor that was! That shed door came from the hay loft door and is now the duck door.
Down with the Barn!
Up with the duck shed!
The only extant photo of the now vanished barn is way down thataway, at this blog's first posts. Photos of the scene follow:
Trying to decipher my own scrawl; 63 inches, 68 inches...?
Hammer in hand, hammering something.
The only extant photo of the now vanished barn is way down thataway, at this blog's first posts. Photos of the scene follow:
Trying to decipher my own scrawl; 63 inches, 68 inches...?
Hammer in hand, hammering something.
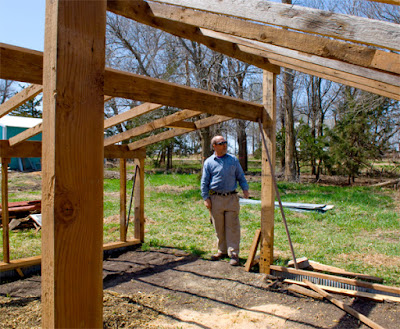
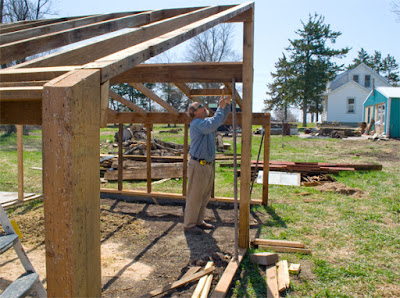
Framing mostly complete. We have no photos of the taking apart part. The weather was a blessing in April and May, sixty days of 70 degree days and rainless until late into May. Most unusual, and yet the lack of rain did not continue into droughts, by the grace of God.
Roughly sixteen feet wide and eighteen deep, excepting the corners and tall middle verticals, (which came from the 'Pallet Palace',all wood came from the barn. Those headers were 18' 2x10's. And a lot of the stretchers were larger by a bit than full 2x4's. Hundred year old wood.
Tuesday, January 13, 2015
Low stools with curved seats.
The top is 1 1/2" thick. They are sturdy and heavy. I would not kick them in frustration.
The next two stools are variations of the curved stool sitting in green grass and dandelions in the photo way below (That one was donated as a door prize to the local Farmer's Union meeting in early December. All are only ten inches high, and some 10 x 13 inches, with comfortable, curved seats. (These two were shaped with recently made planes, one a scraper plane, and both with curved bottoms. Coming attractions!)
Ash legs wedged with cherry, book matched and somewhat quarter sawn. The colors are true.
This beauty was made from nearly matching scraps from different pieces. One usually avoids the yellowish sapwood, though when taken from smaller limbs, six to nine inches, it has not yet become soft or punky, and the contrast is striking, in even small patches.
This one really sparkles in person. I have not made enough of these to settle on a real price...
Subscribe to:
Comments (Atom)


